How to Prevent Shrinkage and Sink Marks in Injection Molding
Published: October 23, 2025 · Reading time: 4 minutes
Introduction
Shrinkage and sink marks are two of the most common surface and dimensional defects in injection-molded plastics. While they may seem cosmetic, they indicate deeper issues in material flow, cooling uniformity, and process balance. Understanding their root causes and prevention strategies is essential for achieving consistent, high-quality molded parts.
Why Shrinkage and Sink Marks Occur
When molten polymer is injected into a mold, it cools and solidifies. During this phase, the material contracts volumetrically. The outer layer (in contact with the mold) solidifies first, while the inner core remains molten. If cooling is nonuniform or packing insufficient, the inner material contracts inward, pulling the solid skin and forming a depression called a sink mark (Fig. 1).
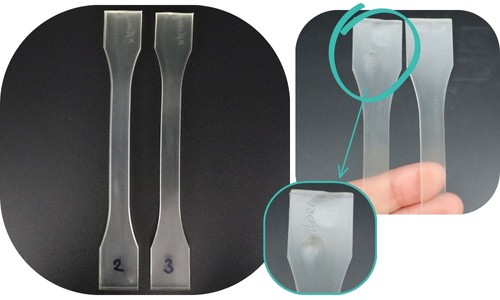
Figure 1. Tensile Test Samples (Left: With Sink Mark · Right: Good Sample)
Excessive or uneven shrinkage can also cause warpage or dimensional instability.
Shrinkage is higher in semi-crystalline polymers (like PP, POM, or PA6) and lower in amorphous or filled systems (such as PC/ABS or glass-fiber composites). Thus, both material choice and process control play critical roles.
Design Strategies to Prevent Sink Marks
Uniform wall thickness is the most effective way to avoid local shrinkage gradients. Thick sections cool slower and shrink more, creating sinks. Designers should:
- Keep wall thickness as constant as possible.
- Core out thick areas or use ribs/webs instead of solid bosses.
- Maintain rib thickness at 50-60% of the adjoining wall.
- Avoid abrupt thickness transitions and sharp fillets.
Good mold design further ensures uniform heat extraction. Cooling channels must reach thick sections, and gate locations should allow effective packing near heavy features. Conformal cooling or high-conductivity inserts can dramatically improve uniformity.
Processing Conditions that Influence Shrinkage
Even with good part design, processing parameters have a decisive influence on final part quality.
Melt temperature: Too high → excessive volumetric contraction; too low → incomplete fill. Always process within the resin supplier’s recommended range.
Packing (hold) pressure and time: During the hold phase, additional molten material compensates for volume loss as the part cools. If the gate freezes too early or hold pressure is insufficient, the part is under-packed, leading to sink marks.
Mold temperature and cooling time: Mold surfaces that are too hot delay skin formation, reducing the effectiveness of the packing stage. Cooling must be sufficient for full solidification before ejection.
Material selection: Reinforced or filled materials reduce overall shrinkage. Moisture control is critical for hygroscopic materials like PA6.
Troubleshooting and Quality Optimization
When sink marks appear, engineers should:
- Inspect the geometry near the defect (look for ribs or thick bosses).
- Check for inadequate packing pressure/time or premature gate freeze.
- Ensure even cooling and verify that hot spots are eliminated.
- Evaluate mold temperature and polymer viscosity settings.
- If necessary, redesign features or change material grade.
A systematic root-cause analysis, supported by mold-flow simulation or design-of-experiments (DOE), helps optimize process settings before full production.
Studying Shrinkage and Sink Marks with the Xplore IM12
For research or low-volume prototyping, the Xplore IM12 Pro micro-injection moulder offers precise control over every phase of the molding cycle. With up to 12 ml shot volume, injection forces up to 18 kN, and mold temperatures up to 300°C (nozzle up to 450°C), it enables accurate simulation of industrial molding conditions at lab scale.
The Xplore IM12 Pro supports multi-cavity mold configurations, enabling the production of multiple test specimens in a single cycle. Standard molds include certified dog-bone tensile bars, Izod impact bars, and pharmaceutical tablet geometries, with custom designs available on request (Fig. 2).
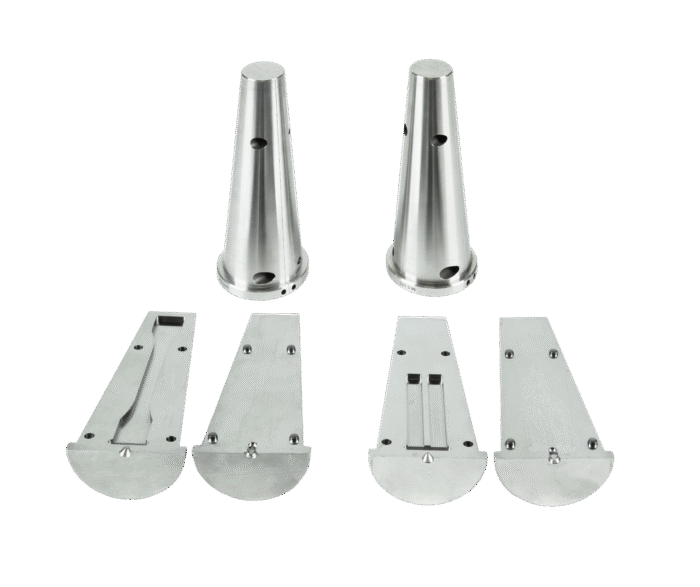
Figure 2. Various mold options for Xplore IM12 micro-injection moulder
In research and prototyping, precise control over injection parameters is essential to understand how shrinkage and sink marks develop. With Xplore IM12 Pro, researchers can easily vary hold pressure, time, and temperature to study their effect on shrinkage and surface quality. The IM12’s programmable pressure profiles and quick heating/cooling make it ideal for DOE experiments on polymer rheology, packing behavior, and mold temperature distribution.
Conclusion
Shrinkage and sink marks arise from nonuniform cooling and insufficient packing, but they can be prevented through design, controlled processing, and well-planned experimentation. For product developers and researchers, benchtop tools like the Xplore IM12 Pro help visualize, quantify, and ultimately eliminate these defects early in the development cycle, ensuring that the final molded product is dimensionally stable and aesthetically flawless.